-
Notifications
You must be signed in to change notification settings - Fork 54
VIA and Remap
0.9.14+
- The desktop app of VIA (https://github.com/the-via/releases/releases) doesn't recognize an individual keyboard which runs on PRK Firmware. Please use Remap (https://remap-keys.app/) instead
- Also, not all the features which Remap supports work on PRK-VIA
- For some reason, updating
keymap.rbsometimes removesvia_map.txt. In order not to be frustrated,- Read this page carefully
- Don't try to finish all the settings at once, backup
via_map.txtoften
It'd be great if we can find a good way to share keymap.rb and prk-conf.txt because VIA is likely used by people who are not knowledgeable about programming than people who prefer writing their keymap with a text editor.
Let us hear your opinion to make a better ecosystem.
Let's configure meishi2 for example.
This is the minimum content of keymap.rb to use the VIA feature:
require "via"

kbd = Keyboard.new

# This should happen before `kbd.init_pins`
kbd.via = true

kbd.via_layer_count = 1

kbd.init_pins(
  [ 6, 7 ],   # row0, row1
  [ 28, 27 ]  # col0, col1
)

kbd.start!
Don't forget writing require "via" at the top of the script.
It loads the VIA module that makes Keyboard#via= available.
You need to prepare prk-conf.txt so that Remap can recognize a specific keyboard.
The format of the content is [Vendor ID]:[Product ID]:[PRODUCT].
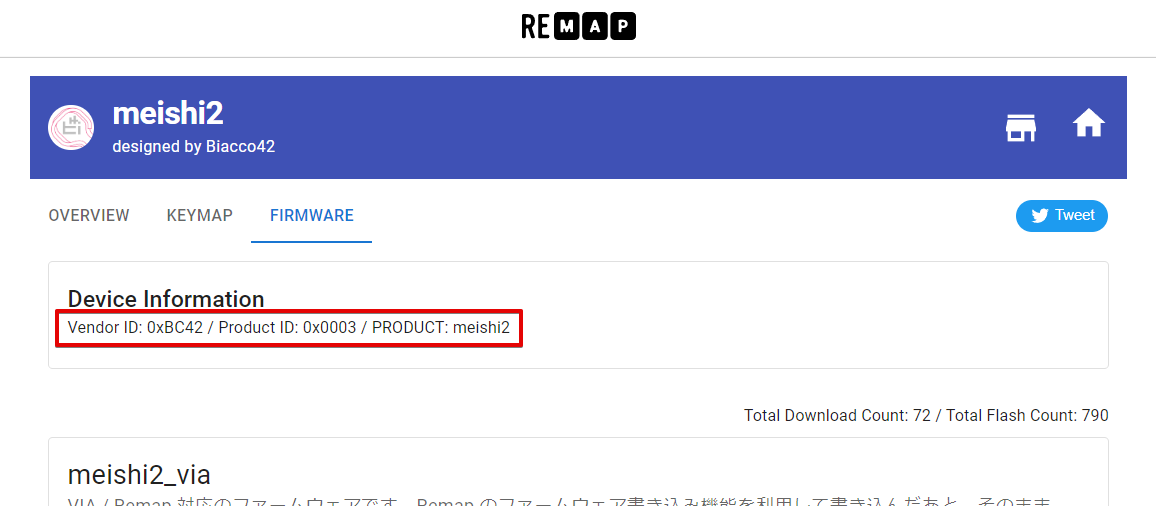
You can get those values in the Remap's catalog page of meishi2 for example:
https://remap-keys.app/catalog/756NcK1aaYMm9CuJhcTA/firmware

Copy the values of "Vendor ID", "Product ID" and "PRODUCT" and paste them at the very top of prk-conf.txt in the format below:
0xBC42:0x0003:meishi2
Note that this line must NOT include any other letter except a line feed.
Eventually, your "PRK DRIVE" drive should look like this:
PRK DRIVE
├── keymap.rb
├── prk-conf.txt
└── via_map.txt  # This is going to show after configuring on Remap
Rebooting the microcontroller applies prk-conf.txt.
The configure page of Remap (https://remap-keys.app/configure) will identify your keyboard. Enjoy!

It is recommended to save a copy of keymap.rb, prk-conf.txt and via_map.txt (automatically created by configuring a keymap in Remap then you can obtain the latest one after one more rebooting the board) on your local PC because upgrading PRK Firmware is going to remove them.
If you have those three files, you no longer need even Remap the next time. Just dragging and dropping them into "PRK DRIVE" drive restores your keymap (unless there is any breaking change in the new PRK Firmware🤞).
Let's say you are making three layers in your keyboard.
You need to define mode-keys in keymap.rb in advance of connecting to Remap as the code shows.
kbd.via_layer_count = 3
kbd.define_mode_key :VIA_FUNC1, [ :KC_SPACE, :VIA_LAYER1, 200, 200 ]
kbd.define_mode_key :VIA_FUNC2, [ :KC_ENTER, :VIA_LAYER2, 200, 200 ]
Note that it is VIA#define_mode_key, NOT Keyboard#define_mode_key, but their API design is almost the same.
See Layers-and-mode-key for more information about mode-key.
In this example, each mode-key works as the table describes:
| Key | Tap to input | Hold to change layer |
|---|---|---|
| :VIA_FUNC1 | :KC_SPACE | Change to LAYER1 |
| :VIA_FUNC2 | :KC_ENTER | Change to LAYER2 |
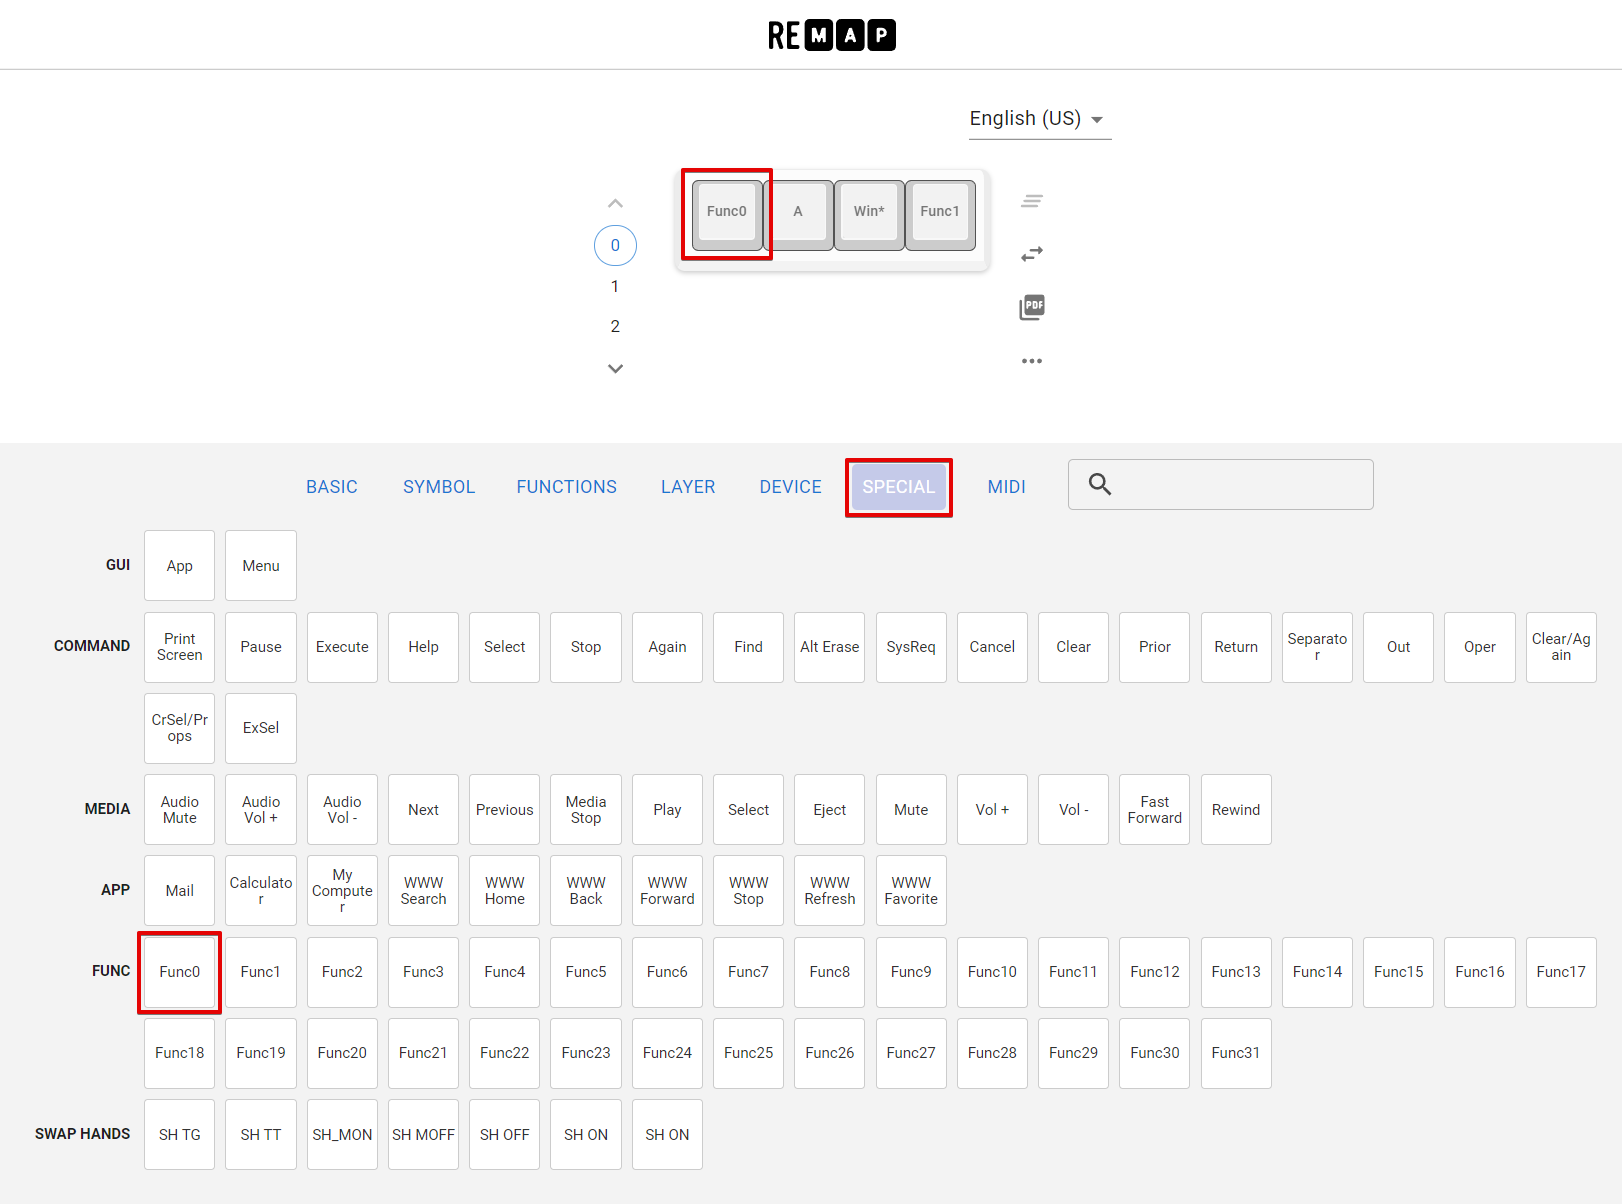
Unlike traditional VIA, PRK requires "Func" keys to configure layers.
The image below shows how you can find and configure a "Func" key in Remap:

These keys can be configured through Remap (DEVICE > UNDERGLOW section):
| Keyname in Remap | Keycode in PRK |
|---|---|
| RGB Toggle | :RGB_TOG |
| RGB Mode+ | :RGB_MOD |
| RGB Mode- | :RGB_RMO |
| Hue+ | :RGB_HUI |
| Hue- | :RGB_HUD |
| Sat+ | :RGB_SAI |
| Sat- | :RGB_SAD |
| Bright+ | :RGB_VAI |
| Bright- | :RGB_VAD |
| Effect Speed+ | :RGB_SPI |
| Effect Speed+ | :RGB_SPD |
As of 0.9.14, rotary encoders can't be configured through Remap. Write in keymap.rb instead.
See Rotary encoder
As of 0.9.14, features that PRK doesn't support like media keys and mouse buttons wouldn't work even if they look available on Remap.
- Getting started
- Keyboard features
- Keycodes (ja)
- Mouse (ja)
- Layers and mode key (ja)
- Debounce
- Composite key
- Split-type keyboard
- Keyscan matrix
- Num Lock, Caps Lock and Scroll Lock
- Useful methods that make you free
- BIOS mode
- Other features
- Examples
- Development
- Contribute to the Wiki
- FAQ